Since every piece of the Summit Pack sling style backpack calls for at least one layer of fusible interfacing, I block fused all my fabric before tracing the pattern pieces and cutting anything out. This also allowed for tighter spacing, generally wastes less fabric, and prevents mistakes of cutting asymmetrical pieces backwards. It's also way faster because it reduces the time spent cutting by at least half.
For the pieces the pattern says to use a second layer of fusible interfacing on, I used fusible fleece instead. It still produces a soft outer bag but looks more substantial and professional. (Two layers of SF101 just looks more starched and doesn't look as nice over time because bags can start to look sloppy and tired with use.) I cut the fusible fleece a quarter inch smaller all the way around the pieces to keep the extra bulk out of the seams.
Pic 2 shows an example of the smaller fleece pieces and also shows why I was annoyed with the extra "trim as you go" pattern instructions - I had to go back and remove a bit of the fleece from the bottom edge after trimming.
For the pieces cut from foam, I cut the foam the same size as the pattern pieces and then basted together at quarter inch seam allowance. Only after basting it to the outer fabric did I trim the foam out of the seam allowance right up to the basting line. In general, always cut as late as you can in the construction process - this keeps everything stable and in-line better.
The instructions tell you to clip into the zipper tape along the curves - do NOT do it! The curves are not that extreme and it's almost never a good idea to cut into the middle of a zipper. (Only time I ever really have is when I need to make an almost 90° turn and then I fray check it like crazy.) I had no problem attaching zippers without clipping into them.
I chose to leave off the optional zipper flap/cover on the upper main compartment because I was using printed zipper-by-the-yard and wanted to see the zipper.
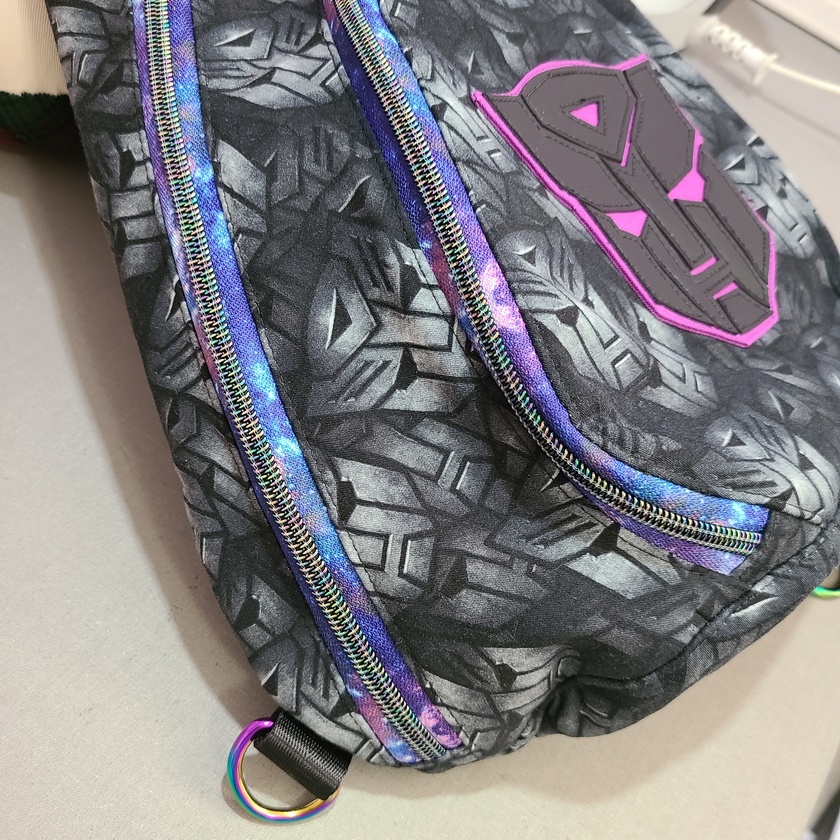
I topstitched the curved edge on the bottom of the bag. It wasn't difficult, but the instructions said it would be and told me not to bother. I think it looks more finished with the topstitching (pic 3).
It also helps to grade the seam allowances where there are more than two layers in a seam. Something I don't think was ever mentioned in the instructions.
I added a hang loop/grab handle at the top where the strap joins the bag. I had planned to add one, forgot when I got to that point in construction, turned the bag, realized I subconsciously needed one to pick up the bag without thinking, and went back to add one on. I also made a big note in the instructions to add a hang loop when attaching the strap - it really really needs one!
Instead of making the lower strap and D-ring tabs out of fabric, I used nylon webbing (same I used for the hang loop). I burned the ends to keep it from fraying away.
I topstitched the upper & lower strap join and the webbing to the slider with X-boxes for added durability. It's a tiny detail but it looks more professional.
And just because I like the look, I "piped" the padded inner pocket and the outer back zipper. No piping was involved, I just cheated the seam allowance on the slip pocket and used a contrasting color lining on the zipper pocket. I also chose to do a second line of topstitching around the inset zippers to hold the edges of the zipper tape down inside the pockets since they weren't under the lining.
And lastly, I added an extra D-ring to the strap. This was simply to solve a problem I wasn't expecting - the seam of the slider was a bit sharp on the edges and was snagging the webbing every time I tried to move the slider. I tried filing it, but it took off the rainbow finish and didn't completely smooth it out. So I added a piece of webbing to cover it and made it look intensional with the extra D-ring.
#bagmaking #CloudsplitterBags #SummitPack
I spent the day priming things for paint and then I remembered to shoot a quick video. #SewingStudioBuild
I started cutting all the edges while Janet was away yesterday morning. When she got back after lunch, she pulled out a roller and started filling in. I'll put a pic below in the comments. #SewingStudioBuild
We broke for lunch and then came back with a portal ac unit plugged in to an extention cord from the house. Can't wait until they finished hooking up all the electrical and we have the mini split cooling the room for us - it was stupid humid today! #SewingStudioBuild
Merry Christmas, everyone!
If you're looking for something Christmasy to listen to/watch over the next few days, here's the most recent episode of my favorite podcast Blurry Creatures. It's a really fascinating (and nerdy) deep dive into the Biblical story of the Magi.
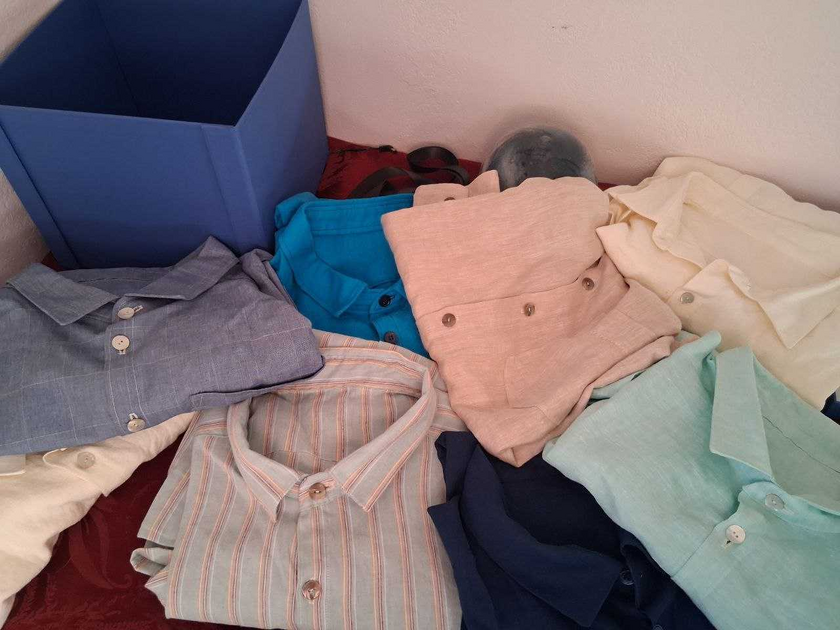
Two days after my son turned in his last paper for his bachelor's degree, I finished my shirt sewing project. Eight shirts, made to measure. Most of the fabrics are linen. Yes, regrettably you can tell exactly when I got my sewing machine repaired... but I hope these help him as he moves through his master's program and in life.

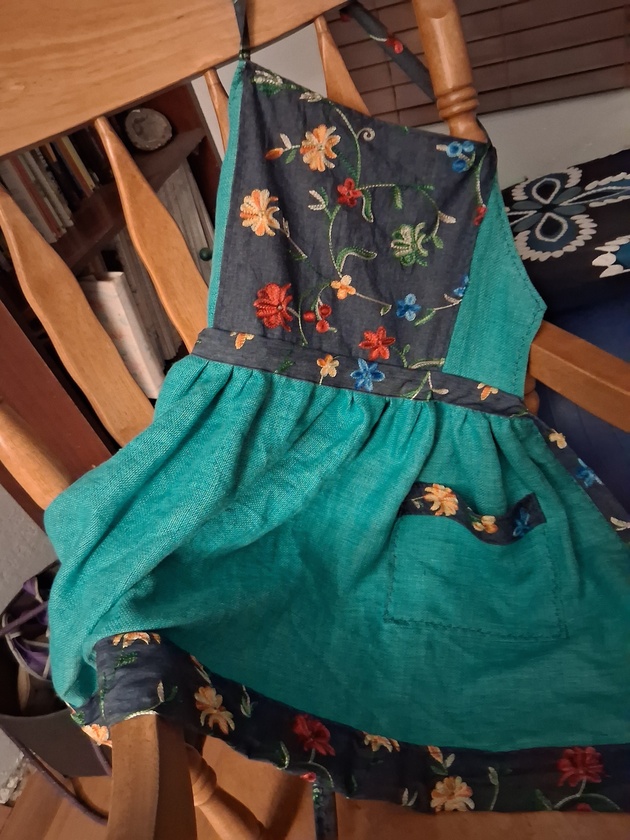
We had a very quiet Thanksgiving, and I'm doing palate cleansers between the shirts in my shirt gift project, so I ran through the scrap pile and made myself an apron.
Aprons, IME, should be made of thicker fabrics in order to actually prevent splashes and stains from getting to your real clothes. Both of these were skirt leftover bits :)


