I mentioned hemming men's dress pants at an angle to keep them from ending up too long or short in the comments of another post. Thanks @deforestliz for asking for an example post - it's one of those alterations I've done so frequently at work (sometimes 50 pairs of pants at a time!), I forget that not everyone is familiar with angled hems. =)
Especially with the current tapered-leg styles of men's dress pants, it's hard to get a good length hem if a pair of trousers is turned up on a line parallel to the ground. So you see a lot of men with pant hems above the back of their shoes & socks showing or the opposite extreme of double or triple breaks (or even piles of wrinkles) sitting on the shoe laces in the front. I personally (and most costume designers I've worked with) prefer a single break on the top of the shoe in front with a length that hits in the middle of the heel just above the sole in back.
In order to achieve the not-too-long-not-too-short look, pants usually need to be hemmed shorter in the front than the back. It's a much easier thing to do if you can chop off the excess hem allowance beyond 1"-1.5" turn, but with costumes, I'm usually dealing with 4" extra to an extreme 11" deep hem (those are never pretty!) that can't be cut off if the costume is going to live in stock afterwards.
So here are 3 separate examples of angled pant hems. To mark the angle, pin center front and center back of each leg at desired length (with shoes) and then angle the hem after the fitting.
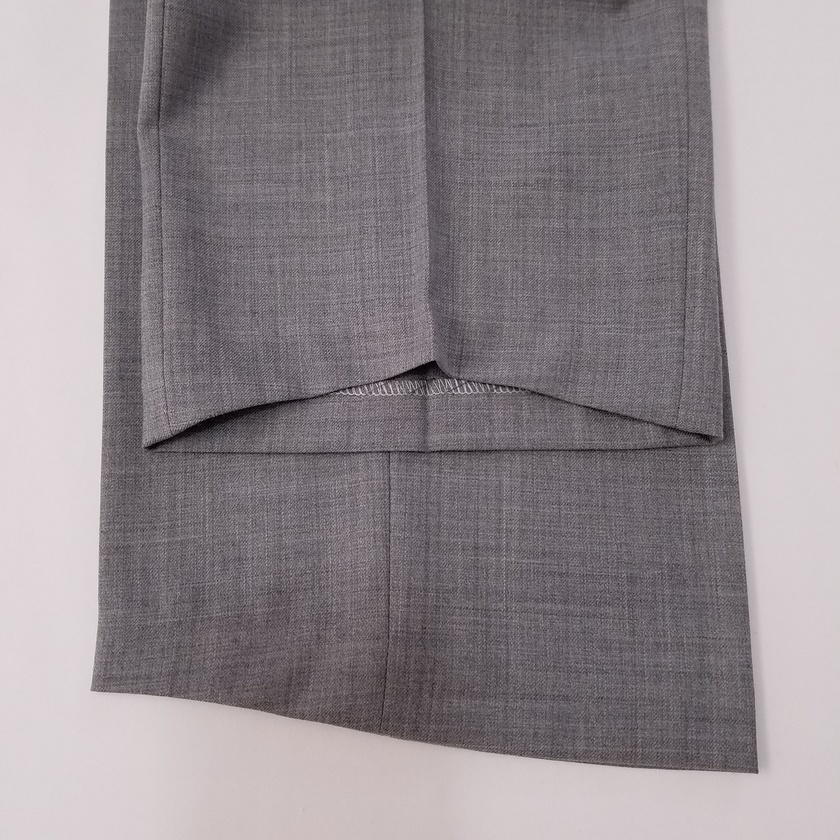
First photo is a grey pair I hemmed for my husband (@rwtrekker) when he had to buy a tapered pair (not his usual style) for a wedding. The front ended up being about an inch shorter than the back to get a single break on the top of the foot. I was able to cut the extra off since they weren't a costume, so the hem is about an inch deep turn. I scooped the front more with a curved line.
Second photo is a pair of tux pants from costume stock at the opera. Straight line is easiest if the pants aren't too tapered, but if the hem is more than 2" deep all around, the inseam and outseam usually need to be split open.
Third example (reddish pair of pants) is from a rented opera and had been previously hemmed with a horizontal dart in the front at the bottom of the turn up. (I took photos as I was letting the hem down before a fitting.) It's a handy costume alteration if there's time to do it and the fabric presses out well. If the fabric holds creases too much, I usually avoid a dart as it will look extra sloppy if the hem is let down later.
Let me know if you have any questions in the comments!
#TrouserHem #sewingtips #tutorial
I spent the day priming things for paint and then I remembered to shoot a quick video. #SewingStudioBuild
I started cutting all the edges while Janet was away yesterday morning. When she got back after lunch, she pulled out a roller and started filling in. I'll put a pic below in the comments. #SewingStudioBuild
We broke for lunch and then came back with a portal ac unit plugged in to an extention cord from the house. Can't wait until they finished hooking up all the electrical and we have the mini split cooling the room for us - it was stupid humid today! #SewingStudioBuild
Merry Christmas, everyone!
If you're looking for something Christmasy to listen to/watch over the next few days, here's the most recent episode of my favorite podcast Blurry Creatures. It's a really fascinating (and nerdy) deep dive into the Biblical story of the Magi.
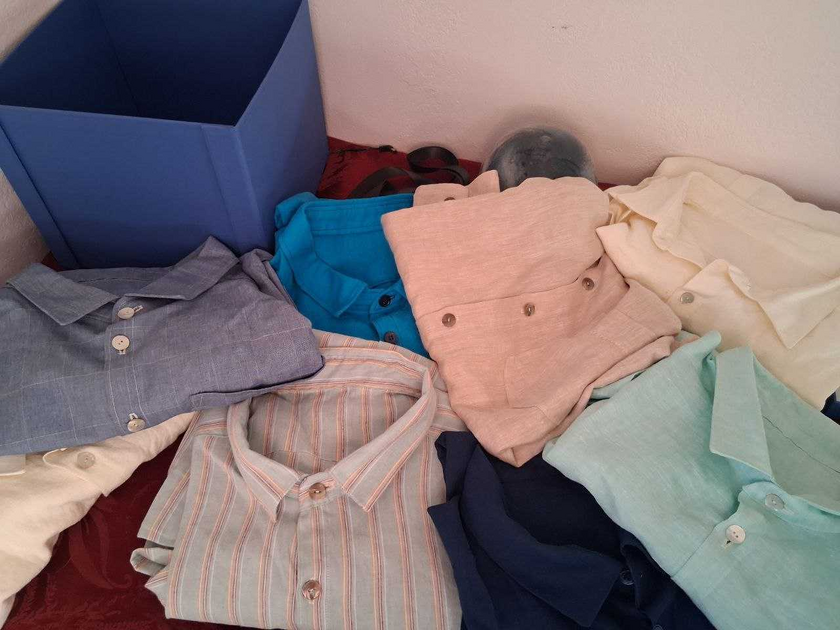
Two days after my son turned in his last paper for his bachelor's degree, I finished my shirt sewing project. Eight shirts, made to measure. Most of the fabrics are linen. Yes, regrettably you can tell exactly when I got my sewing machine repaired... but I hope these help him as he moves through his master's program and in life.

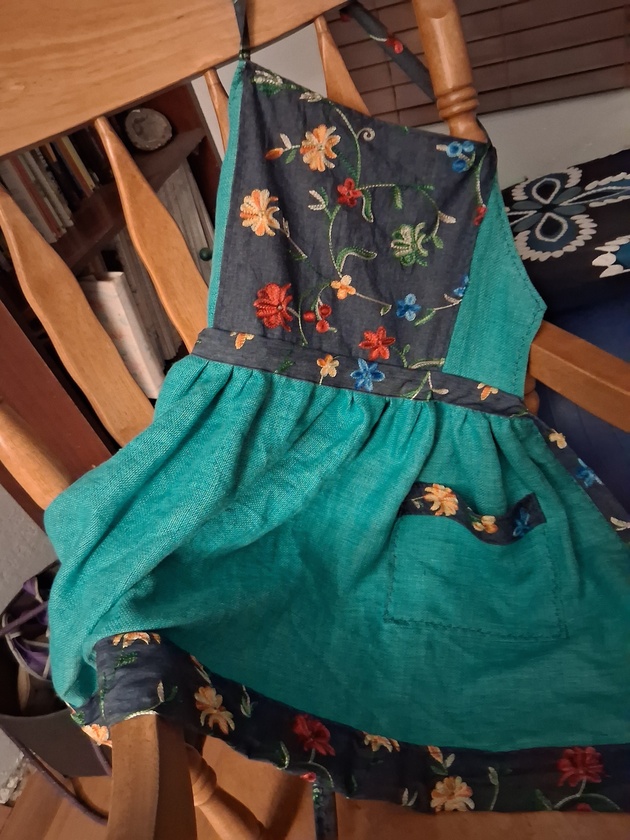
We had a very quiet Thanksgiving, and I'm doing palate cleansers between the shirts in my shirt gift project, so I ran through the scrap pile and made myself an apron.
Aprons, IME, should be made of thicker fabrics in order to actually prevent splashes and stains from getting to your real clothes. Both of these were skirt leftover bits :)


