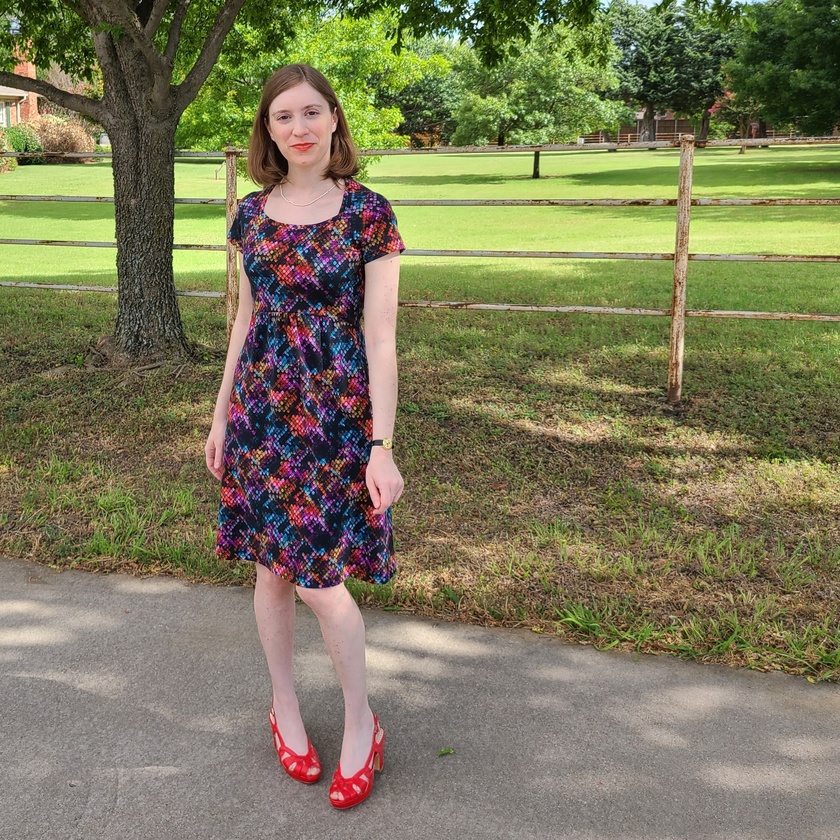
Overall, this #itchtostitchpattern is pretty good. (Last photo is an epic #SundaysareforDerps lol!)
The sleeve is a little tight on my shoulder joint (not sure if that's because I'm boney or if that is just how it's drafted) and the armseye needs to be dropped 3/4". I suspect that the armseye is too high because the pattern was drafted without dropping it for a raglan sleeve - that should be the first step when converting a set-in sleeve to a raglan. Easy enough to fix if I make the top version later.
I didn't use any interfacing and the instructions call for it in multiple places but it would just add bulk where you won't want it. I also didn't apply the clear elastic to the waist seam the way specified - if I had cut it to fit my waist and stretched it to fit, the dress would be impossible to get over my shoulders and bust. Clear elastic is just meant for stabilizing seams as it doesn't stretch like regular elastic. So I just serged it in the seam as I attached the skirt to the bodice. That means the waist keeps its shape without stretching out but it isn't tight against my skin.
After wearing it, I realized I needed to take in the back neck on each raglan seam because it gaps quite a lot (more obvious when I'm sitting). I probably didn't notice that during construction because the tightness of the sleeves was throwing me off. I'll fix it this afternoon and post some pics later.
I'm not crazy about how the waist gathers sit on my bum center back. If I ever decide to make another dress with this pattern, I'll be changing the skirt. Luckily, the print is enough of a distraction that it's not the first thing you focus on, but it feels a little weird. It might hang better in a super drapey knit, but I'm not sure and that wasn't what the pattern called for.
I would also recommend cutting your neckband pieces longer than the pattern draft if you make one. I cut mine at the length of the measured neckline on the pattern and then stretched to the measured length and chopped off the bit that went beyond. If I had cut as drafted, my neckband would have been too tight for this cotton knit with good recovery.
I think once I correct the pattern, I'll really like using it for some t-shirts.
#GlenellyTopandDress #itchtostitchdesigns
I spent the day priming things for paint and then I remembered to shoot a quick video. #SewingStudioBuild
I started cutting all the edges while Janet was away yesterday morning. When she got back after lunch, she pulled out a roller and started filling in. I'll put a pic below in the comments. #SewingStudioBuild
We broke for lunch and then came back with a portal ac unit plugged in to an extention cord from the house. Can't wait until they finished hooking up all the electrical and we have the mini split cooling the room for us - it was stupid humid today! #SewingStudioBuild
Merry Christmas, everyone!
If you're looking for something Christmasy to listen to/watch over the next few days, here's the most recent episode of my favorite podcast Blurry Creatures. It's a really fascinating (and nerdy) deep dive into the Biblical story of the Magi.
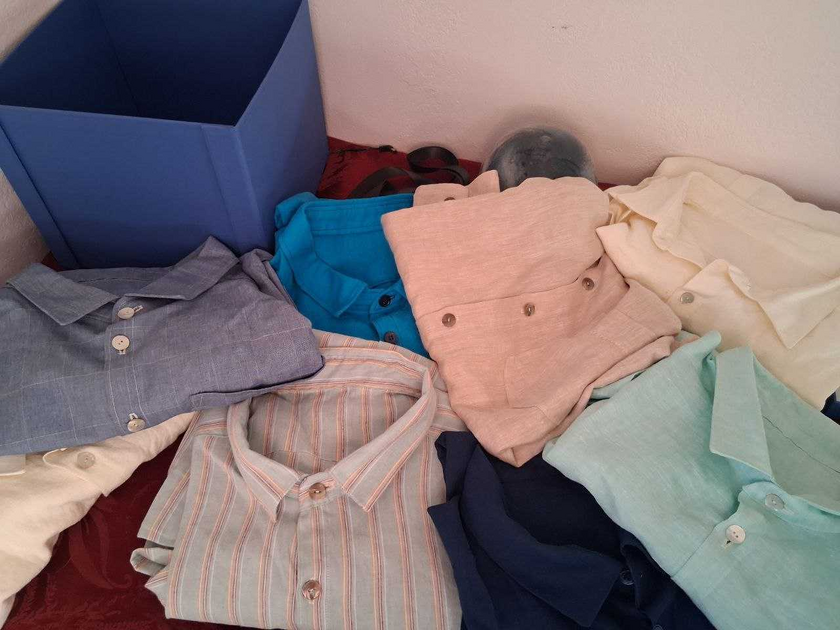
Two days after my son turned in his last paper for his bachelor's degree, I finished my shirt sewing project. Eight shirts, made to measure. Most of the fabrics are linen. Yes, regrettably you can tell exactly when I got my sewing machine repaired... but I hope these help him as he moves through his master's program and in life.

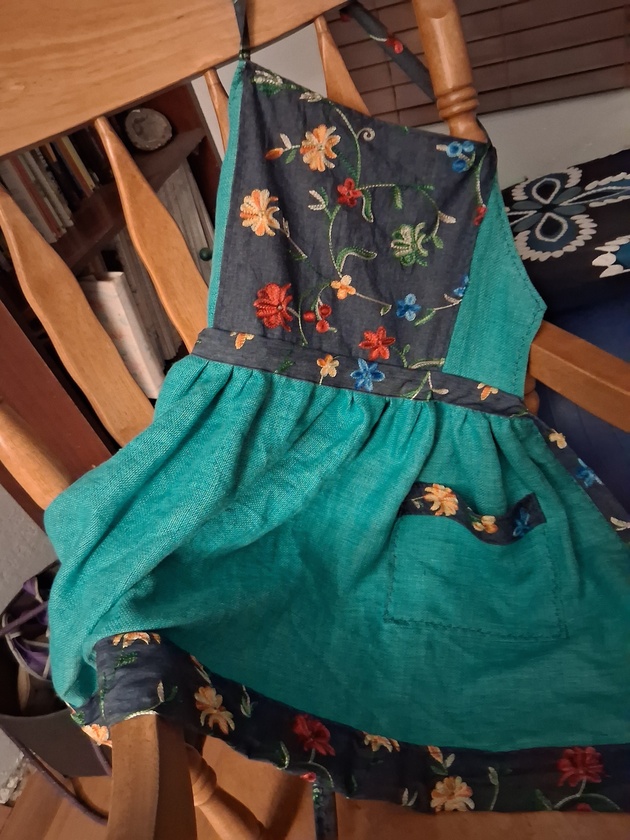
We had a very quiet Thanksgiving, and I'm doing palate cleansers between the shirts in my shirt gift project, so I ran through the scrap pile and made myself an apron.
Aprons, IME, should be made of thicker fabrics in order to actually prevent splashes and stains from getting to your real clothes. Both of these were skirt leftover bits :)


